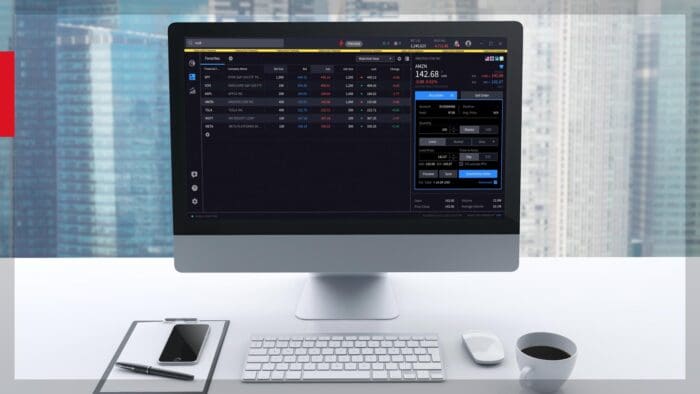
The Integrated Stock Window in IB’s Trader Workstation (TWS) may be used to trade, view charts, and see deep book market data all from a single integrated window. The Integrated Stock Window (ISW) can be opened from Mosaic or Classic TWS and can also be added as a panel in a custom layout. Additionally, there is a pre-configured Integrated Stock Window layout available in the Layout Library. The Layout Library can be accessed by clicking on the plus sign next to the bottom right-hand corner.
It is possible to create a custom layout and open multiple Integrated Stock Windows to view several tickers at the same time. However, the number of deep book data windows that you can display at a given time (including BookTrader, ISW and Market Depth) is dependent on the number of market data lines you are allowed. Market data allowance is based on commissions, available equity, and other criteria. For details on how market data allowances are calculated, see the Market Data Display section on the IB website.
To launch the Integrated Stock Window in Classic TWS, click Trading Tools from the top menu and select Integrated Stock Window under the Stock/Futures Focus section.
 In Mosaic, Integrated Stock Window can be opened by clicking New Window in the top left corner, scroll to the bottom to hover over More Advanced Tools and select Integrated Stock Window.
There are several separate panels that make up the Integrated Stock Window by default. The Quote Panel is displayed at the top where you can type to enter a ticker symbol in the Financial Instrument column or select from a drop down of your recently entered tickers. The Quote Panel can be hidden or revealed to display market data on a single row. The wrench icon in the top right corner of the panel can be used to manage the data columns displayed. Use the switch view icon in the top right corner of the panel to toggle between the single-row display and ticker view.
 Underneath the Quote Panel are the Deep Book and Chart Panels. The Deep Book panel displays both Level I and Level II subscription and non-subscription quotes on either side of a real-time, configurable chart.
 Click one of the Deep Book Buttons to add data from a market center to the Deep Book panel. Once selected, the button will turn blue indicating the data from that market center is now displaying in the Deep Book panel below. If you do not have the market data subscription for the selected exchange, a pop-up window will open informing you of the missing subscription. You can open Client Portal and enable market data from the subscription page. Select Cancel to close the pop-up or select OK to open Client Portal in your default web browser.
Bid prices for the chosen security are displayed in descending order from top to bottom on the left whereas ask prices are shown in ascending order from top to bottom on the right of the chart. You can modify the chart by right-clicking on the chart and selecting Chart Parameters from the menu. For more information on chart modifications, please see our video lesson on configuring TWS Charts. Use the expand/contract arrows on either side of the chart to maximize or minimize the chart.
 When you click on a bid or ask price from the book data panels, that price is reflected in the order line in the Order Entry panel towards the bottom of the window. From the Order Entry Panel you can submit new orders or modify existing orders. By default, the order attributes will populate based on your TWS order presets. However, you can still make changes to the order attributes prior to transmitting the order. Please see our other video lesson for further information on configuring order presets.
 By default, your order is routed using IB’s SmartRouting technology, but you may use the Destination selector to route your order to a specific exchange if you prefer. If you would like to use one of IB’s algo order types, select IBALGO at the bottom of the Destination menu. A separate tab will appear towards the bottom of the window allowing you to select from the list of available algorithms and enter the required values using the input fields.
Using the drop downs in the main Order Entry panel, you can modify the Order Type, Time-in-Force, Quantity, Price, Stop Price and whether all or a portion of the quantity is displayed to the market. The Auto order in the Type field can be used to have TWS select the order type based on the price values you enter. This feature is a short-cut to save you the extra step of having to choose the order type first then define the price criteria. Some order attributes are hidden by default, but you can check the box in the right side of the panel to Show all attributes.
 When you are ready, use the BUY or SELL buttons to transmit the order and an order confirmation is generated. This popup can be disabled by checking the box in the lower left corner for “Do not display this message again.”
Your own working orders are displayed with a white background in the data panels.
Slightly above the Order Entry Panel is a Buttons Panel which can be used to quickly modify or cancel existing orders. The default buttons can be used to move the initial price up or down by one-or-two-ticks, lift it to the current market ask or bid or convert it to a market order. Note that these buttons will be grayed out unless you click on a specific open order. For example, I can select my working order and click the Up 0.02 button to move my order price up two ticks then click the Replace button in the Order Entry Panel to request cancellation of the initial entry and replace it with the modified order.
You can also add two additional buttons panels for a total of three by clicking Configure at the top, then opening the Settings. Check the box next to display the Left and Right Button Panels and click Apply and OK. The buttons in the right panel can be used to open other TWS tools for the financial instrument such as BookTrader or OptionTrader. The default buttons in the left panel can be used to quickly place new orders, such as a buy Limit order at one tick below the Bid price. However, in all three buttons panels, you can create new buttons, change the display order of the buttons, and edit or delete existing buttons in order to best suit your trading needs. To do so, click the wrench icon in the top right side of the buttons panel to open the Global Configuration window.
Select New to create a new button and select the action from the available drop-down list. For example, I will create a button to sell with a limit price at the Bid/Ask Midpoint plus $0.01. When Sell is selected from the actions drop down, the window will expand to display additional customizations. I will select LMT as the Order Type and select Bid/Ask Midpoint as the Limit Price. On the Limit Price line, enter 0.01 as the offset amount. I can also change the background color of the button and in this example, I will change it to red. Once my new button is added, I can click the button and my sell order will be submitted with my defined order attributes.
The buttons can be armed for Instantaneous Transmission so that the order is instantly modified or submitted without needing the extra clicks to replace the order. To do so, click the Armed checkbox in the top right corner of each panel and agree to the warning disclosure. Button names will include an asterisk (*) when they are set to Instantaneously Transmit the order once clicked. The attribute can be removed by de-selecting the Armed checkbox.
As an alternative to the buttons, you can also modify an order directly in the Order Entry Panel by clicking on a specific working order in the drop down and making the necessary changes.
The Integrated Stock Window can be fully customized to best suit your trading needs and objectives. To open the Global Configurations for Integrated Stock Window, select Configure from the menu across the top and click Settings. As discussed earlier, you can decide exactly which panels are displayed or you can use the menu on the left side of the Global Configuration window to customize the specific panels themselves.
 Note that Hotkeys can also be configured for the Integrated Stock Window. Hotkeys allow traders to assign keystroke commands to create shortcuts within TWS that are designed to rapidly create or transmit orders. For more information on creating and using Hotkeys, please see our dedicated lesson on Hotkeys.
As we’ve discussed in this lesson, the Integrated Stock Window is a powerful tool that allows TWS users to view charts, monitor deep book market data and quickly transmit and modify orders all from a single screen.


Join The Conversation
If you have a general question, it may already be covered in our FAQs page. go to: IBKR Ireland FAQs or IBKR U.K. FAQs. If you have an account-specific question or concern, please reach out to Client Services: IBKR Ireland or IBKR U.K..
Visit IBKR U.K. Open an IBKR U.K. Account